Tuesday, 9 November 2010

YIPPEEE! Our new website is finally here! : )

SO EXCITED!!!!!! We can barely contain ourselves!!!

After months of hard graft, we're proud to announce the launch of our new look website! YAY!!


The Mooks website was our first attempt at web-design and - whilst we've been designing for print for more years than we care to remember (!) - web design is a little bit more tricky, especially for a newbie... to say the least!!

Since we created the first Mooks site, we've designed 6 or 7 websites for other small businesses and our web skills are a little more polished now than when we started. We've been thinking that we may need a little face-lift for the last 6 months or so, and began re-designing our site back in September. Finally, after hours staring at a computer screen (Caro has got square eyes now - looks most odd!) we've finished!! All of the links work (hopefully) and it should be much easier to add lots of lovely new ranges!

We'd better get designing!!!

PS -


Your votes really do count! Thanking you in advance,

The small and dedicated team at Mooks xxx


Monday, 18 October 2010

Busy, busy, busy...

Wow - it's been such a long time since we posted on our blog.... and feeling everso slightly guilty that we've not managed to keep it up to date...* blush*. Having said that, things really have been so incredibly manic recently that there just don't seem to be enough hours, doing our day to day stuff, without managing to type a running commentary as well : )

We Mooks have been rushed off our feet, what with the summer wedding season in full swing, we've also moved house and business premises - from Marlow to the East Midlands - PLUS we've also just exhibited, for the first time, at the National Wedding Show at the NEC... PHEW!


As it was our first show, it took an awful lot of planning and worrying, but we're really happy to confirm that it went amazingly well and the feedback from our clients has been absolutely fantastic!

As well as meeting past and potential customers, it was also a great opportunity to meet our friends from Wedding Ideas and Perfect Wedding magazines! So lovely to meet the girls that we regularly speak to, and finally put faces to names etc!

Also a really good opportunity to meet other wedding suppliers and fellow stationers within the industry! Such lovely camaraderie between everyone, that they made the 3 days (plus the set-up day) pass really quickly!

One business that we think our brides will love is 'Your Wonderwall'. Lovely Allie, who runs the company, kept us amused (and sane) over the weekend! They had also just done the London leg of the show, the week before, so the fact that she was so full of energy and humour was pretty impressive!

A 'wonderwall' is a beautifully personalised montage of your favourite photos, telling a story of a special someone or occasion.


In short, they will take the pictures trapped on your PC, in albums and boxes, and then turn them into a large showpiece for your home.

Just give them your photos- either professional or amateur - and their design team turn them into contemporary wall art. All are available in a choice of stunning glass frames or on canvas.


We were really impressed by the concept, but also by the frames that they are supplied in! The vintage style frames would be absolutely perfect for our wedding seating plans! The frames come in lots of different finishes, but our favourites, by far, are the black or ivory classic frames... they'd look stunning with one of our Rambling Rose or Damask wedding table plans in!


We're taking a breather for a couple of weeks then gearing up for all of the Christmas weddings that are coming up, but we shall definitely be exhibiting at next years shows... it may take another 6 months to recover from this last one, but hopefully by next Autumn, we'll be all set to do it again!

Hopefully speak to you soon (we'll try to make it a little sooner than last time...!) X


Thursday, 1 July 2010

Snowflakes in summer...

Summer's here - Wimbledon is in full swing - and we are totally rushed off our feet. Wedding season is truly upon us once more : )

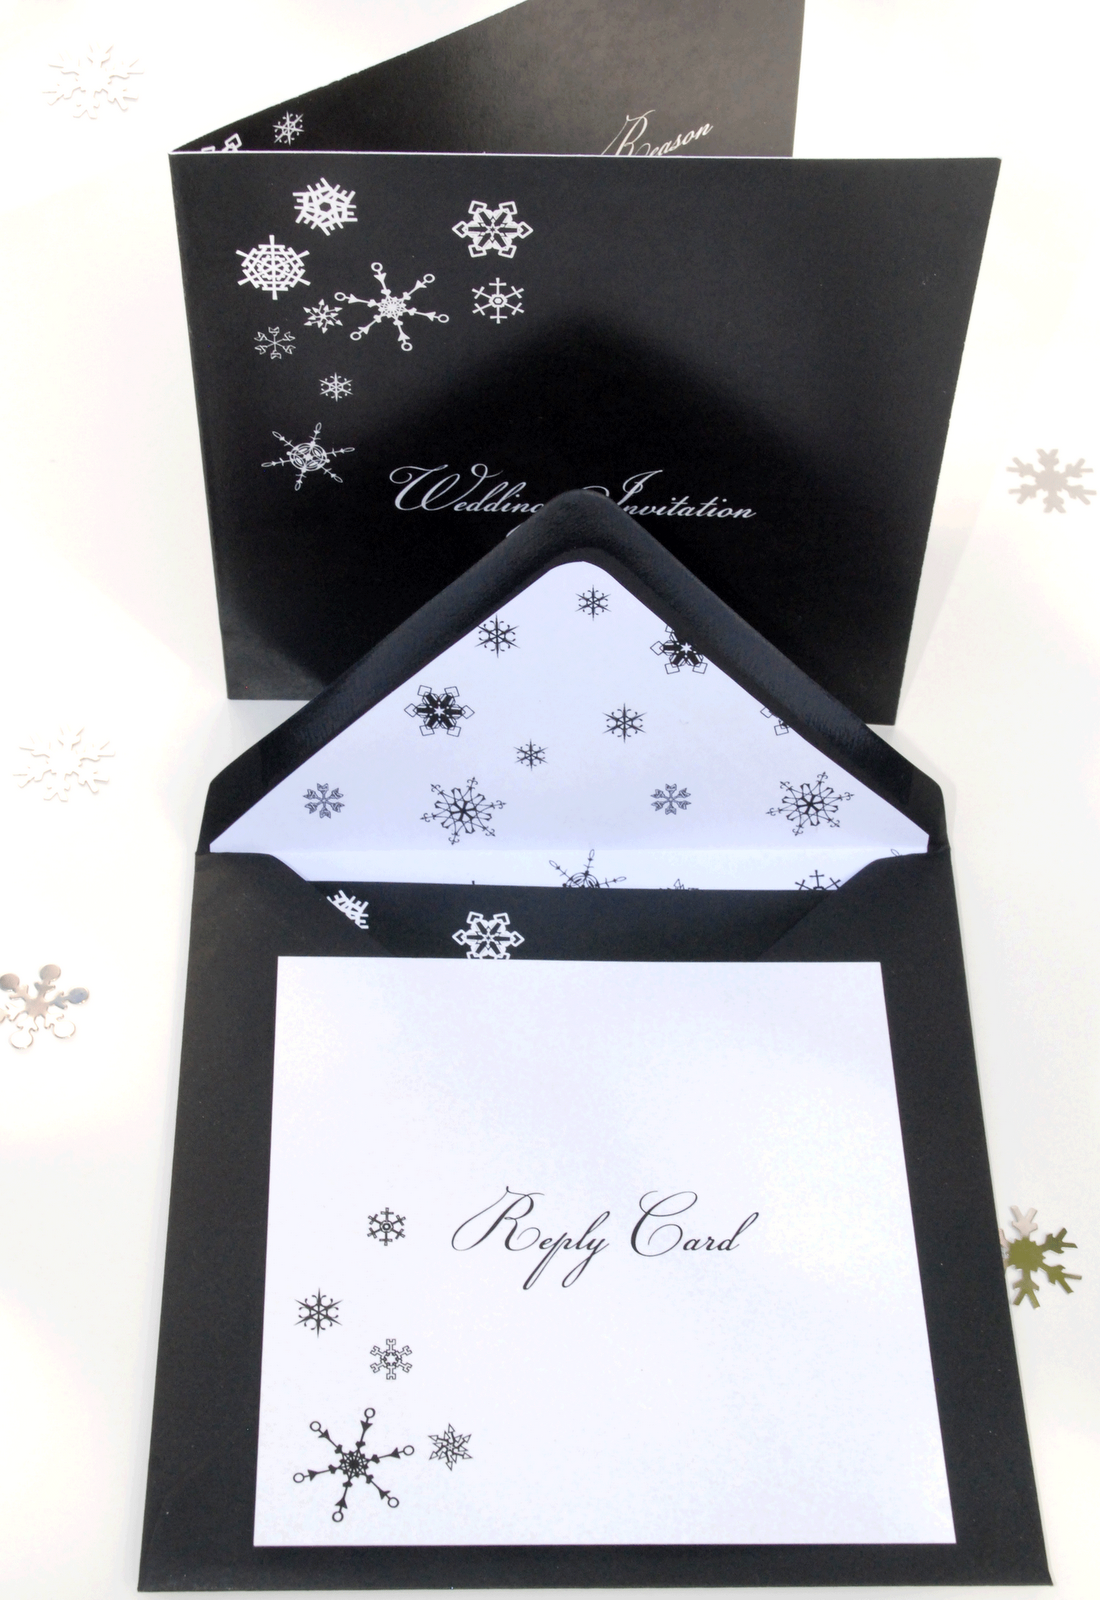
Whilst we're putting the finishing touches to reception stationery now for many of the summer weddings that we designed the invitations for, earlier in the year, we're also being asked to design lots of Christmas wedding invitations and winter wedding stationery sets.

It's a wee bit strange to be working with snowflake illustrations - and other such wintery iconography - whilst there's blistering heat outside, but hey-ho... at least life is never dull!

Here are a couple of pics of just some of the winter invitations that we've designed...


As ever, if there's something that you'd like, but haven't seen it on the blog or the Mooks Design website, just drop up an email at info@mooksdesign.co.uk and we will design something especially for you : )


Friday, 30 April 2010

Just wanted to show you one of our latest bespoke designs!


We were to commissioned, by a lovely couple call Lisa and Tom, to create a completely bespoke wedding stationery range especially for them. The design is a pocketfold invitation, but unlike lots of competitor pocketfolds, these are a little different as we have actually printed onto both sides of the card!

Our stylish couple had searched high and low for a supplier of printed pocketfolds and drawn a blank each time, so when they approached us, they were a little despondent to say the least. We love nothing more than a good challenge and were delighted to help! Caro worked really closely with Greg and the print-team and came up with something that we're all really proud of!

The majority of pocketfold invites, on offer in the UK, are produced from simple coloured card which can then be personalised by sticking flat card invites inside, but other than that, they are fairly standard. We are over the moon with our version - as were Lisa and Tom : ) - as we have created a gorgeous pocket fold format that can be printed in any design our customers choose!


Unusually, the pocket of our design has been formed in the inside front cover of the card - and can contain matching RSVP and info cards - whilst the main invitation wording still appears on the inside right of the invitation. This means that your guests will receive the perfect little pack of wedding stationery - no loose maps or extra bits of paper to lose!

We're just discussing plans to launch the pocketfold invitation as a regular feature of the mooks wedding stationery range... the possibilities are really exciting! Looking forward to posting more pics of different designs to show you! Watch this space....

Monday, 19 April 2010

the painted playroom and other news...

Such a long time since we last posted! Been really busy at Mooks HQ - the wedding season is in full swing and there simply aren't enough hours in the day!

There's lots of exciting things afoot - we're already gearing up for this autumn's National Wedding Show, at Birmingham's NEC, where we'll be exhibiting. It's always lovely to meet our brides - and grooms : ) - and it also gives us a chance to meet possible new clients too!

We spent the Easter holiday exorcising our creative demons and getting up to some (legal) graffiti! Whilst we work mainly on a computer these days, the illustrative skills are still there and given half the the chance, we like nothing more than to put them to good use and get the paints out!

When we were commissioned to paint a little girl's playroom... this, coupled with a very loose brief was all it needed for us to dust down the paintbrushes and get cracking!

Had a tiring, but absolutely delicious time and the results were definitely worth all of the effort! Our little client was absolutely bowled over by her new room. Lying on the day-bed gives you a real sense of being in a secret garden, underneath a magic tree... oh to be 4 again!

Monday, 15 March 2010

Let them eat cake!

Just had to share this amazing cake with you all!

Absolutely stunning on the outside - the design is inspired by vintage fabric - this gorgeous cake almost looks too good to eat... if there is such a thing!

It looks like a beautifully wrapped present, finished off with a century old, French silk ribbon!


The inside is just as pretty too! We've noticed a growing trend at the moment, with cake artists trying to make the inside of their cakes just as attractive as the outside!

This divine wedding cake is made up of red velvet sponge alternating with white butter-cream icing... not only does it echo the ribbon's stripes, but it also makes a surprising change to a bog-standard cake! Sure to be a real hit with your guests


Ingredients

Makes two 10-inch round cakes (8 cups batter)

  • FOR THE CAKE
  • Butter for pans
  • 3 tablespoons unsweetened cocoa powder, plus more for dusting
  • 3 3/4 cups cake flour
  • 1 1/2 teaspoons salt
  • 2 1/4 cups sugar
  • 2 1/4 cups canola oil
  • 3 large eggs
  • 3 tablespoons red food coloring
  • 1 1/2 teaspoons pure vanilla extract
  • 1 1/2 cups low-fat buttermilk
  • 2 1/4 teaspoons baking soda
  • 1 tablespoon white vinegar
  • FOR THE SWISS MERINGUE BUTTERCREAM
  • 3 cups sugar
  • 12 large egg whites, room temperature
  • Pinch of salt
  • 2 pounds (8 sticks) unsalted butter, softened, cut into pieces
  • 1 tablespoon pure vanilla extract
  • FOR THE ASSEMBLY
  • 5 round cakes (each 10 inches across) Red Velvet Cake
  • 16 cups Swiss Meringue Buttercream
  • 2 ten-inch-diameter foam boards
  • 7 dowels (1/4 inch diameter, and about 5 inches tall)
  • 2 1/2 pounds white rolled fondant
  • Edible luster dust in reds, pinks, and greens
  • Lemon extract

Directions

  1. Make the Cake: Preheat oven to 350 degrees. Butter two 10-by-2-inch round cake pans, and dust with cocoa. Whisk together flour, salt, and cocoa in a medium bowl; set aside.
  2. Whisk sugar and oil on medium speed in a mixer fitted with the whisk attachment, until combined. Add eggs one at a time, whisking well after each addition. Whisk in food coloring and vanilla. and add flour mixture in 3 batches, alternating with the buttermilk and beginning and ending with flour; whisk well after each addition. Scrape down sides of bowl as needed.
  3. Stir together baking soda and vinegar in a small bowl; add to batter, and beat on medium speed 10 seconds. Pour batter into prepared pans. Bake until cake tester inserted into centers comes out clean, about 40 minutes. Let cool completely in pans on wire racks.
  4. Make the Swiss Meringue Buttercream (our recipe makes 9 cups):Place sugar, egg whites, and salt in a heatproof mixer bowl set over a pot of simmering water. Whisk until sugar dissolves and mixture registers 160 degrees on a candy thermometer.
  5. Attach bowl to the mixer. Whisk on medium speed for 5 minutes. Increase speed to medium-high, and whisk until stiff, glossy peaks form and meringue has cooled, about 6 minutes. Reduce speed to medium, and add butter, 1 piece at a time, whisking well after each addition. Whisk in vanilla. Use immediately, or cover and refrigerate for up to 3 days. (Bring to room temperature, and beat on low speed until smooth before using.)
  6. Assemble the Cake: Trim tops of cakes to be level. Then slice cakes horizontally into three 1/2-inch-high layers (a tad thinner if possible). Lay one cake layer on a piece of foam board, and spread with a thick coating of buttercream (a tad less than 1/2 inch, about 2 cups). Top with a second cake layer, and spread thickly with buttercream. Repeat until you have 5 cake layers and 4 buttercream layers. Spread a thin coat of buttercream over top and sides of tier to seal in crumbs, and chill until ready to cover with fondant. Repeat for the second tier.
  7. To prepare the bottom tier for stacking, Insert 1 dowel into the center of the cake (trim it to be level with the top of the fondant), and the remaining 6 dowels in a circle 2 inches from the edge of the cake. Set the second tier on top, aligning carefully.
  8. To cover cake, roll out 2 1/2 pounds fondant about 1/4-inch thick. Lay it over the cake, and smooth it down the sides. Trim bottom of fondant with a pizza cutter.
  9. To decorate cake, place it on a decorating turntable. Mix each luster dust with a very small amount of lemon extract to make a paint. Dip a paintbrush into red luster-dust paint, and paint stripes around sides of cake (use painter's masking tape to mark off straight lines; let dry between applications). Use smaller brushes to paint the floral design. If paint starts to dry out, add more lemon extract.
For more amazing cake inspiration, take a look at Martha Stewart's wedding site.

Tuesday, 2 February 2010

dreaming of summer...

February and raining. Not the most cheery combination... such a grey day outside.

The studio, however, is bathed in sunshine as the Mooks team have been whiling away the hours and looking forward to summer - having totally by-passed spring - in our thoughts!

All this talk of long, sunny days and balmy evenings have got us thinking about the up-and-coming summer weddings that we're currently designing for.

We've been helping one of our brides, totally inspired by our new Rambling Rose range, with ideas for her August nuptials. The theme is 'vintage' and we've been researching everything from flowers to crockery. We've found some lovely companies, whose products really complement our stationery, and have passed on some gorgeous reference that conjure up images of the perfect 'Vintage Summer Wedding'.

Have a look, get inspired and forget about the rain : )